Effective Strategies to Attract Leads with Salesforce Marketing Cloud
 Target Everest |
 Generating high-quality leads is crucial for the success of any business — and Salesforce Marketing Cloud offers powerful tools to help make that happen. But how can brands leverage this platform to its fullest potential? From compelling design to strategic automation, here are some tried-and-tested strategies from the Target Everest team to help you attract and convert leads effectively.
1. Attractive Design and Strong Functionality
Create Landing Pages that Convert
A well-designed landing page is the cornerstone of any lead generation strategy. Focus on clear, concise messaging, intuitive layout, and a strong call to action. Make sure your forms are simple and user-friendly and remove any friction points that might stop a visitor from converting.
Use Engaging Visuals
Design isn’t just about aesthetics — it’s about experience. Use cohesive branding, strong visual hierarchy, and attention-grabbing imagery to draw users in. A visually compelling page helps build trust and guides the user through the journey.
Keep Accessibility in Mind
An often-overlooked aspect of design is accessibility. Ensuring your landing pages are inclusive — with readable fonts, high colour contrast, and screen-reader compatibility — not only broadens your reach but also improves user satisfaction and credibility.
2. Social Media as a Lead Engine
Promote Campaigns on Social Platforms
Social media is a natural extension of your Marketing Cloud strategy. Use it to raise awareness, promote downloadable content, or link directly to personalised landing pages. Targeted ads and organic content alike can drive qualified traffic to your funnels.
Create Content that Engages
From short videos to interactive polls, engaging content keeps your audience coming back. Focus on value — whether through educational tips, behind-the-scenes content or customer stories. The goal? Build relationships that eventually convert.
Build Trust Through Authenticity
Today’s audiences value transparency. Use social channels to humanise your brand — spotlight your team, share your process, and interact with followers in real time. These small touches foster connection and can lead to long-term loyalty.
3. Email Campaigns and Automation
Design Emails that Stand Out
Avoid clutter. Focus on mobile-friendly, visually consistent layouts with one key message per email. Compelling subject lines and well-placed CTAs will increase open rates and encourage clicks.
Automate the Journey
With Salesforce Marketing Cloud’s Journey Builder, you can guide users through personalised, automated experiences. Whether it’s a welcome series, abandoned cart flow, or post-download nurture track, automation helps maintain relevance and boost engagement.
Use Dynamic Content
Tailor your messaging to different audience segments using dynamic content blocks. With the right data in place, your emails can speak directly to each user’s needs, increasing both relevance and conversion rates.
4. Analyse and Optimise
Keep an Eye on the Data
Tracking performance in real-time is key. Use Marketing Cloud’s reporting features to monitor key metrics like open rates, click-throughs, and conversions. This helps you make informed decisions and pivot quickly.
Test, Learn, Improve
A/B testing isn’t optional — it’s essential. Experiment with subject lines, layouts, CTAs, and visuals to understand what drives the best results. Use those learnings to optimise future campaigns.
Don’t Forget the Long View
While short-term metrics are important, it’s equally critical to evaluate the broader impact of your campaigns over time. Monitor lead quality, customer lifetime value, and retention to understand how your efforts translate into sustained business growth.
5. Real Success Stories
Campaigns that Made a Difference
We’ve seen incredible results from clients using Salesforce Marketing Cloud to manage B2B and B2C campaigns. One hospitality client, for instance, used Einstein Bots to guide guests in real-time — easing pressure on customer service and improving the guest experience.
Team Tips
Our design and social media team recommend always aligning creative with clear KPIs. Less is often more, especially when your goal is to nudge someone towards a specific action.
Consistency is Key
Regular testing and optimisation are important, but so is consistency. Keep your branding, tone of voice, and visual language unified across every touchpoint to reinforce trust and build recognition.
6. What’s Next in Digital Marketing?
Stay Ahead of the Curve
AI-driven personalisation, voice search optimisation, and zero-party data strategies are shaping the future. Salesforce Marketing Cloud is already adapting to these shifts — and so should your strategy.
Adapt and Evolve
Marketing never stands still. Continuously investing in your team’s skills and technology stack ensures you’re ready for what’s next — and always one step ahead in attracting the right leads.
Want to learn more about how Target Everest can help your business grow with Salesforce Marketing Cloud? Let’s talk!
Explore more articles on our blog!
Salesforce Email-to-Case Tutorial
 Target Everest |
 What is Email-to-Case?
- Email-to-Case helps automate customer support by converting received emails from customers into cases and auto-populating fields for quick resolution. Email-to-Case on-demand service manages email traffic outside the network’s firewall and limits messages to 25 MB.
Email-to-Case Key Features and Benefits
- Seamless association of customer responses with original cases, including attachments, streamlining case management.
- Comprehensive case reporting tracks both inbound and outbound emails, providing insights into issue resolution processes.
- Flexible routing addresses enable the creation of multiple email addresses for converting customer emails into case fields.
- Integration with Assignment Rules, Escalation Rules, Workflow Rules, and Auto-Response Rules ensures smooth operation and enhanced efficiency.
Setup Email to Case in Salesforce with Microsoft 365
Before anything we have to set a couple policies in Microsoft 365 Admin
- Open the Microsoft Admin
- In Admin Centers Tab, go to Security
- In Email & collaboration tab, go to Policies & rules
- Here go to Threat policies
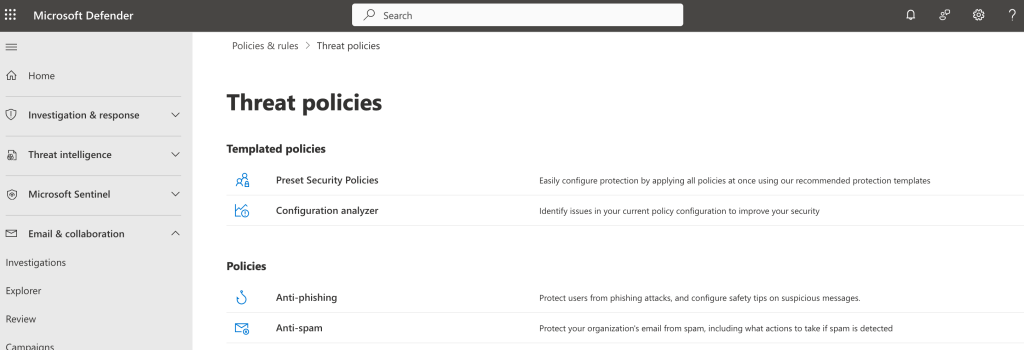
- Then Anti-spam policies
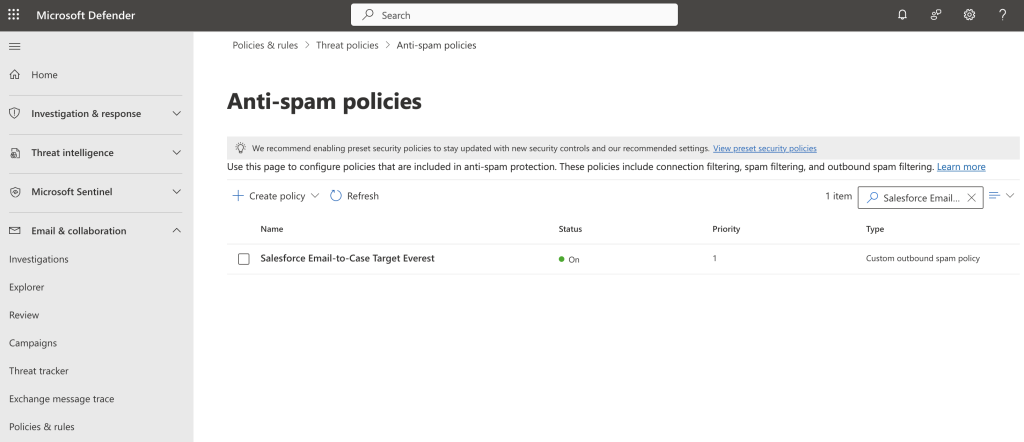
- In here click Create policy > Outbound
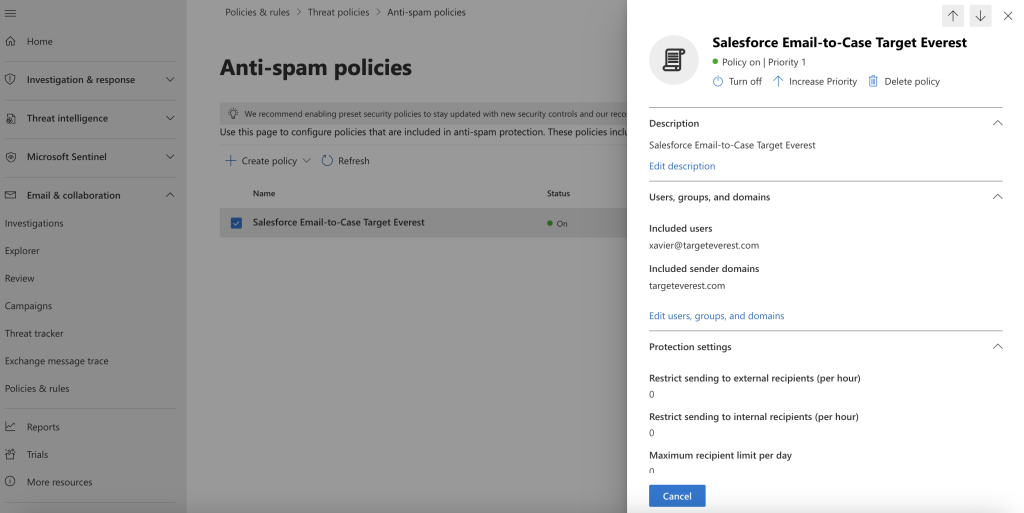
- Follow these Steps during Policy creation
- Set policy name accordingly
- Set user, group or domain to include on this policy
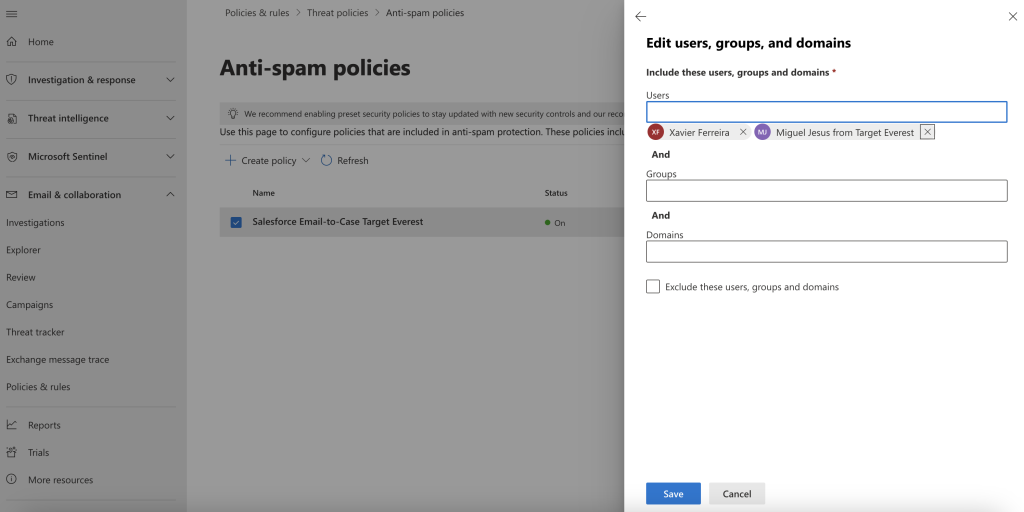
- On the Outbound Protection Settings, set the Automatic Forwarding Rules to “On – Forwarding is enabled
And we are done here!
Back to your Salesforce Environment
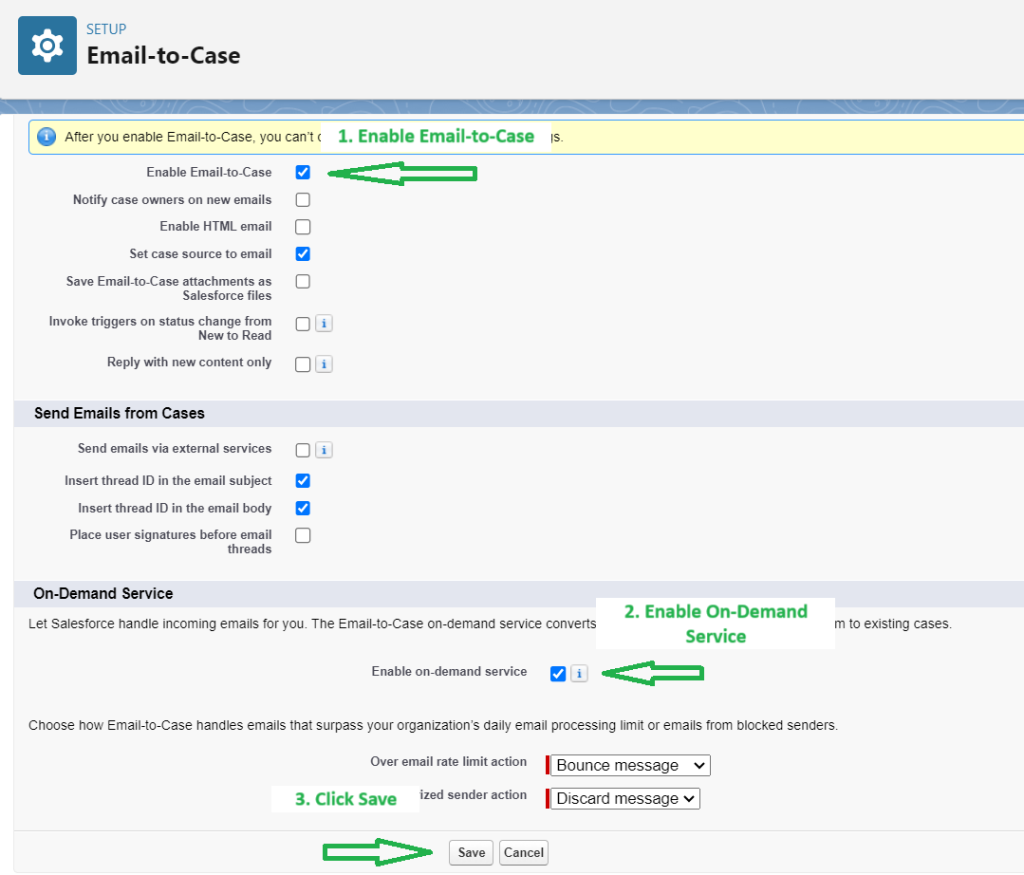
1. The first step is to enable Email-to-Case in Salesforce
- Go to Setup
- In “Quick find”, search and open “Email-to-Case” and click on the “Edit” Button
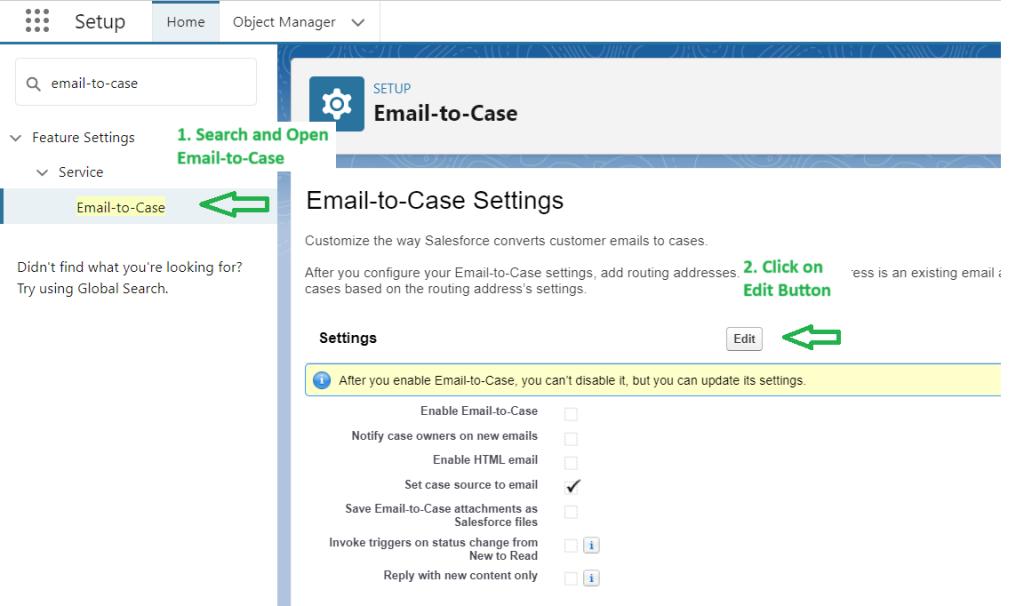
- Select “Enable Email-To-Case” and “On-Demand Service” then click on Save.
2. Next are the Routing Addresses for Email-to-Case
- Click on the “New” button from the Routing Addresses related list (at the bottom of the page)

- Define requirements:
- Set the Routing name for the Email-to-Case. The example used is “Exemplo Email To Case”
- Set the Email Address where the requests will be received. In this example the used email was “[email protected]”
- Check the “Save Email Headers” Checkbox in the Email Settings
- If you are the Owner, Under Case Settings, choose Queue in the Case Owner Dropdownlist and select the corresponding Queue.
If not, just select User in the Dropdownlist and Insert the User - Define the default case priority according to your needs. In this example we defined it as Medium
- Define the case origin. In this example we defined it as Email

- Click Save
After Finishing, Salesforce will send you an email to your Email Address to verify the email ID

- Salesforce will automatically create an email id for you.
Copy the generated Email Services Address meanwhile.

Setup Routing on the Email Provider
3.1. Setting Up Routing/Forwarding Rules is the next step with Gmail
Now it is time to configure our email forwarding setting at our outlook, Gmail, or email provider.
- Configure your email system to forward messages received at [email protected] to auto-generated service addresses.
As we are using Gmail for the demo. User Gmail Article for Automatically forward Gmail messages to another account- In your Gmail, click on the settings icon, See all settings.
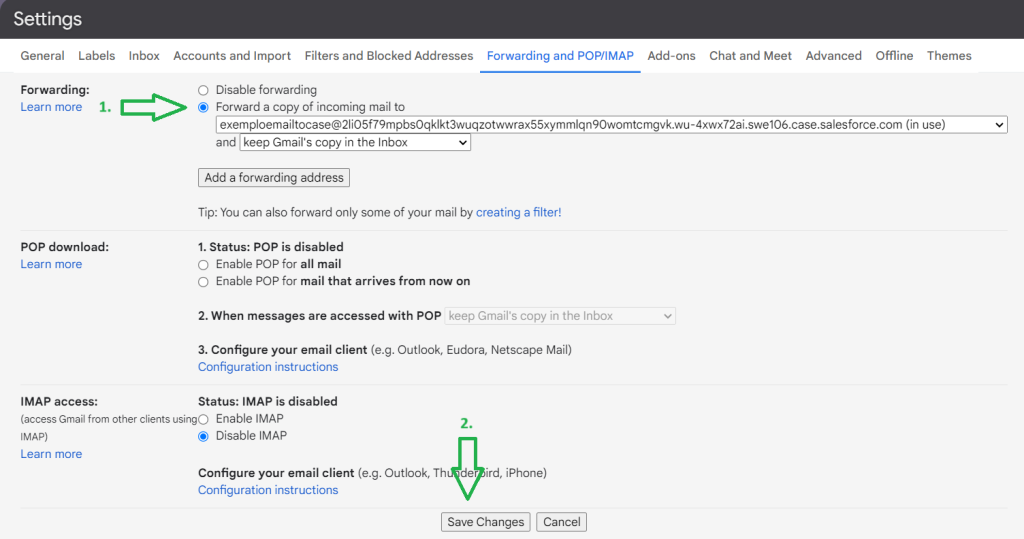
- Then Click on Forwarding and POP/IMAP tab.
- Then click on the “Add a forwarding address” button.
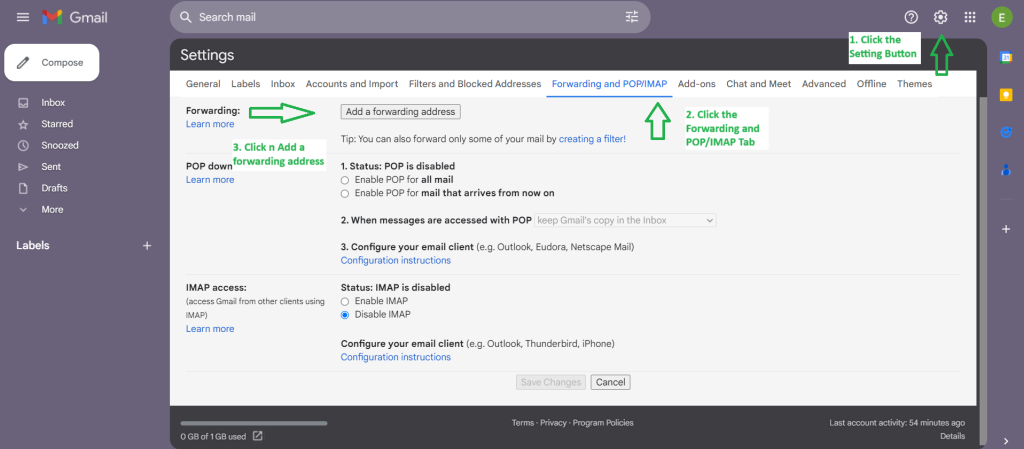
- Add forwarding address as the email provided by Salesforce.

- With the email added, you will now see a Confirmation Screen saying forwarding email to auto-generated Salesforce email-to-case email ID.
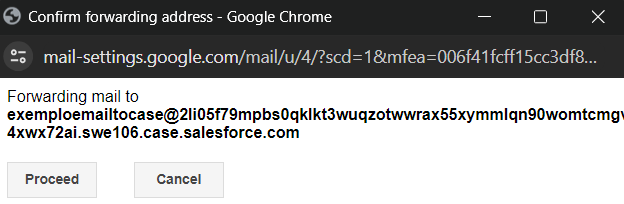
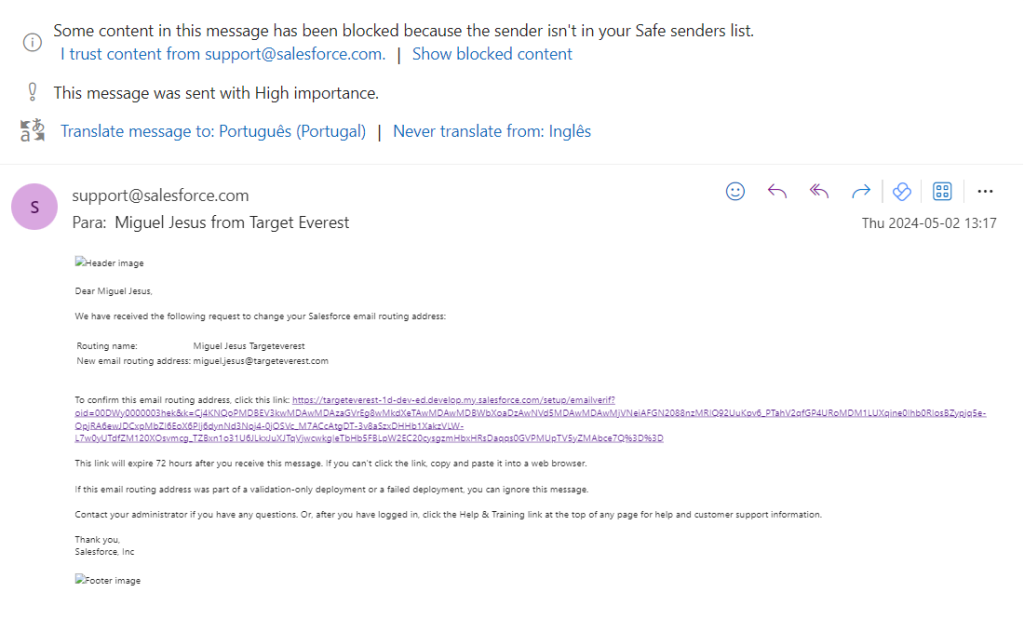
When you proceed, a new case will be created in Salesforce where you will have to open a link to confirm the forwarding email.
- Open the Salesforce case in Services and open the link. This means our email-to-case is working!
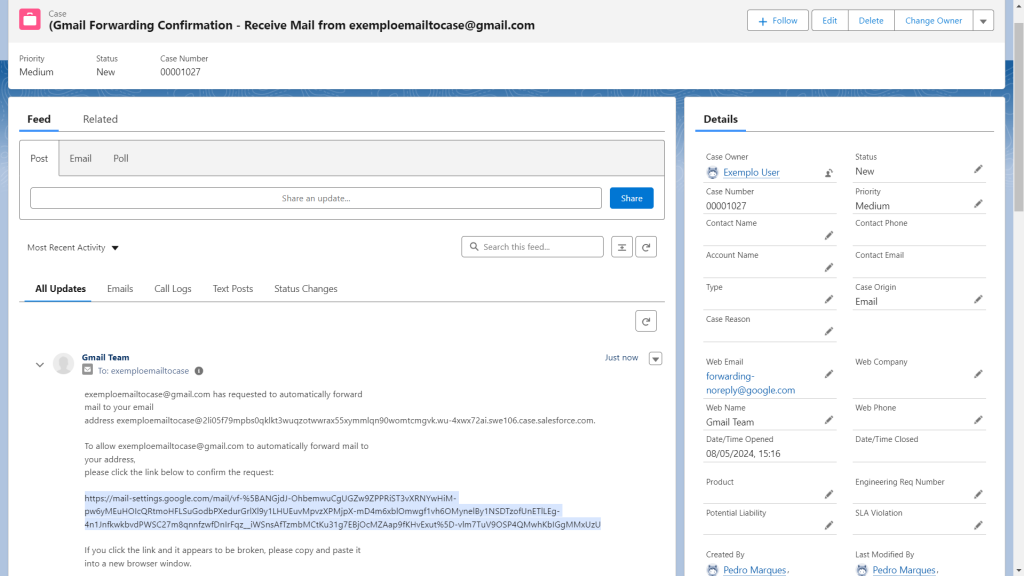
- After opening the link, click the confirm button to ensure the forwarding is set
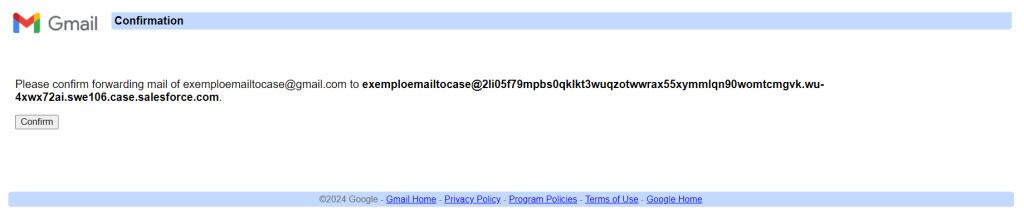
- With this done, our last step is to go to the Gmail Settings again, and turn the forwarding on for the email we just confirmed, then click Save
With this, we have concluded the Email-to-Case Setup using Gmail
3.2. Here we will show the steps for Outlook instead of Gmail
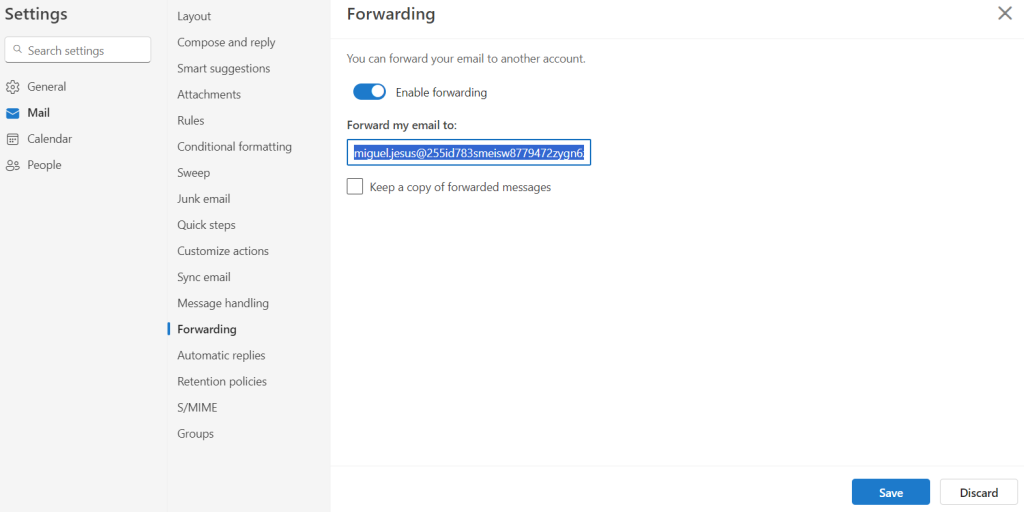
- Accept the request from Salesforce (an email is sent after creating and configuring email-to-case in salesforce)
- Now we have to Define the forwarding rule
- Define criteria as needed for these configuration
- In action: Choose “Redirect to” and insert previously copied email
- Rule Name: SF Environment – Email-to-case – Account test
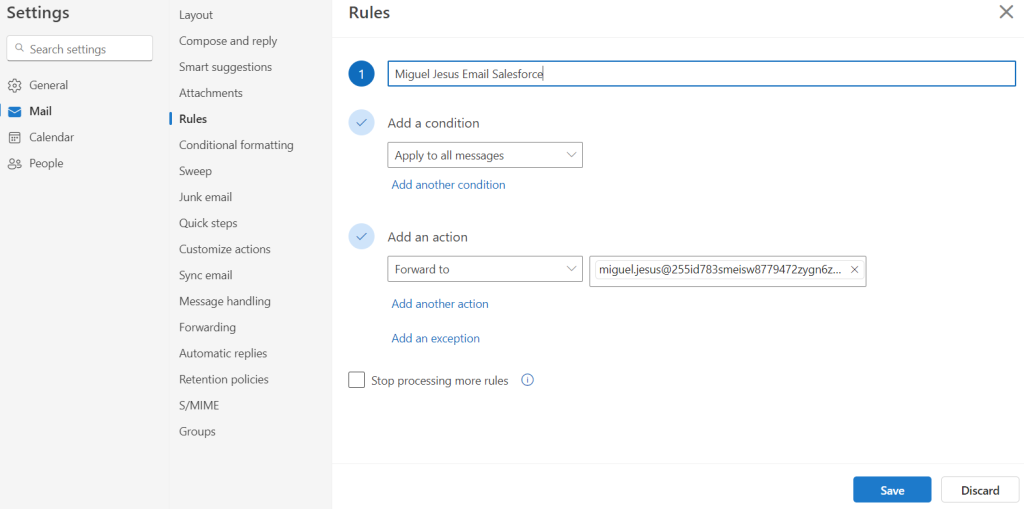
- (Ex: Forwarding Email – Email-to-Case – Account test)
Curious about Salesforce Email-to-Case? Fill out the form, and we’ll contact you shortly with more details!
Explore more articles on our blog!
Do you want to hear more?
Our team of experts specializes in Salesforce and is dedicated to providing top-notch services to help your business succeed. If you're looking for Salesforce® solutions or have any questions, please feel free to reach out to us. We'd love to hear from you.
Contact us