Guide On How To Create a Chatbot
 Target Everest |
 Activating Digital Engagement in Salesforce
- Go to Salesforce Setup (gear icon in the top-right corner).
- In the search bar, type “Digital Engagement Settings”.
- Enable Digital Engagement to access messaging channels such as WhatsApp.
Setting up WhatsApp in Salesforce
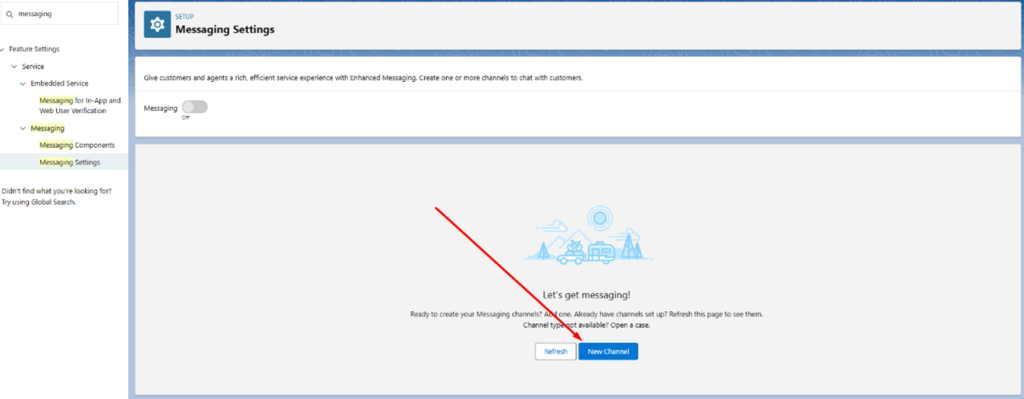
1. In Salesforce Setup, search for “Messaging Settings”.
2. Click the “New Channel” button to add a new WhatsApp channel.
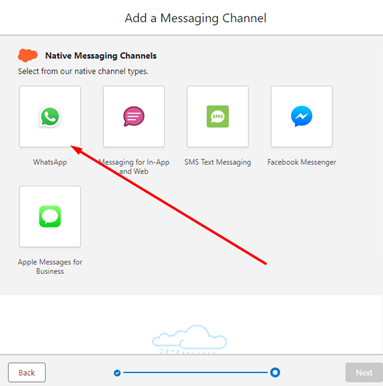
3. Select the WhatsApp channel
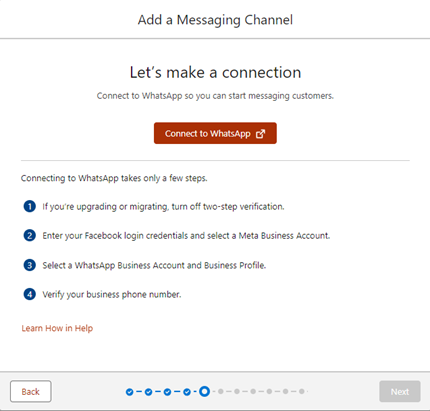
4. Follow the instructions to configure the WhatsApp number. You will need to log in to connect to your Meta account.
Creating an Einstein Bot
1. Setting up and creating Einstein Bots in Salesforce
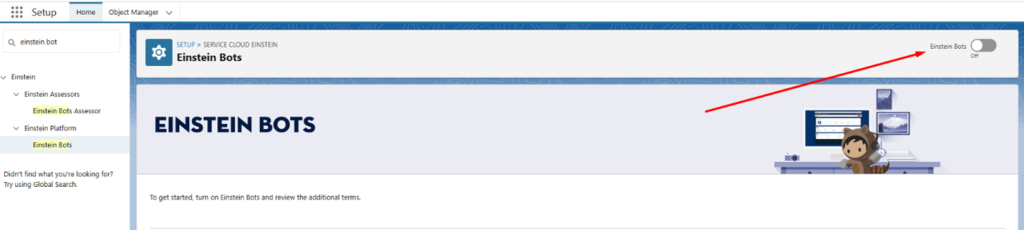
1.1. In Salesforce Setup, search for “Einstein Bots”.
1.2. Select “Bot Builder”.
1.3. Enable the Einstein Bots functionality in the top-right corner.
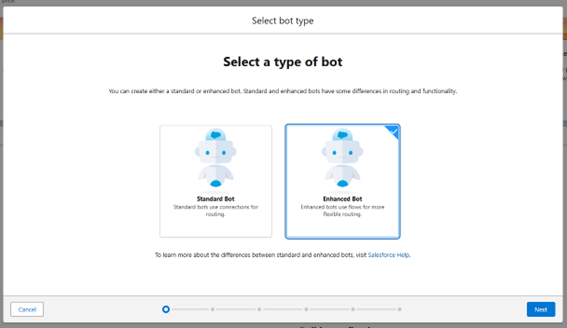
1.4. To create a new bot, click the “Create a New Bot” button.

1.5. Select the type of bot you want. In this example, we will choose Enhanced Bot.
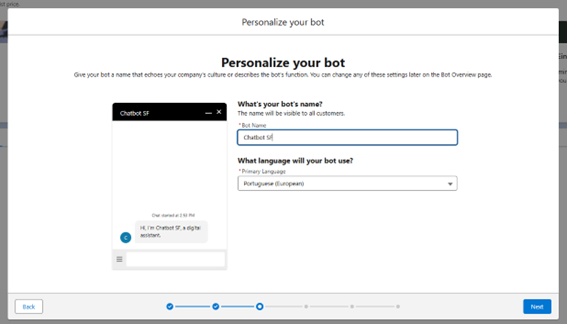
1.6. Select the language you want the chatbot to recognise. You should also specify the name of the chatbot.
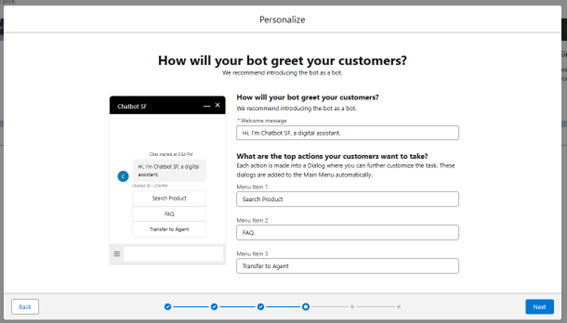
1.7. Configure the Welcome Message to be displayed at the beginning of the conversation with the bot. Optionally, you can define up to 3 dialogue options for the bot to present as a menu.
2. Define Intents and Conversation Flow.
2.1. Create the bot dialogues (the automated responses the bot will provide) by configuring intents and conversation flows.
2.2. The Einstein Bot uses Process Builder or Flow Builder to map these interactions. Ensure that your conversation flows are well-defined to handle the most common questions and responses effectively.
3. Integration with WhatsApp
3.1. After configuring the bot, navigate to the Messaging Channel menu.
3.2. Select WhatsApp as the desired channel and associate it with the Einstein Bot
Testing and Activating the Bot on WhatsApp
1. Testing the Bot
1.1 Use Omni-Channel or a sandbox to test the bot, ensuring it responds appropriately and the conversation flow functions correctly.
2. Activating the Bot
2.1. Once testing is complete and the bot is working correctly, activate the bot in the production environment.
Explore more articles on our blog!
For more information about Salesforce, fill out the form below and get in touch with our experts today!
Do you want to hear more?
Our team of experts specializes in Salesforce and is dedicated to providing top-notch services to help your business succeed. If you're looking for Salesforce® solutions or have any questions, please feel free to reach out to us. We'd love to hear from you.
Contact us